Are you looking to give your walls a fresh new look? Plastering can be a great way to achieve a smooth and polished finish. In this step-by-step guide, we will walk you through the process of plastering a wall from start to finish. From preparing the wall to applying the final coat of plaster, we will cover everything you need to know to achieve a professional finish. So, grab your tools and materials, and let's get started!

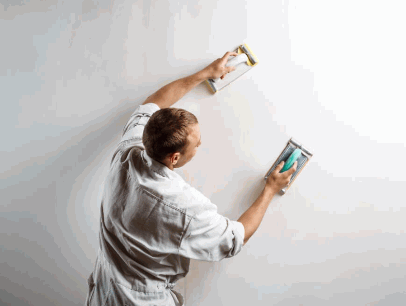
To start a plastering project successfully, you will need a variety of tools and materials. These include a trowel for applying the plaster, buckets for mixing the plaster, dust sheets to protect the surrounding area, dust masks for safety, sandpaper for smoothing, and a stepladder for reaching high areas.
Another essential tool is a hawk, which is used to hold the plaster for easy access while working. A float is needed to achieve a smooth finish on the plastered surface. Safety goggles should also be worn to protect the eyes from any flying debris.
Other materials like plaster mix, water, level for ensuring even application, and brushes for cleaning up are crucial for a successful project. Keeping a work light handy can help illuminate dimly lit areas during the plastering process.
Before you begin plastering, it's crucial to prepare the wall properly. Start by ensuring the wall surface is clean and free of any dust or debris. Check for any cracks or imperfections that may need to be addressed before applying the plaster.
Once the surface is clean, inspect it thoroughly for any signs of water damage, mould, or loose paint. Use a torch to spot hidden issues that could affect the plastering process.
Next, make sure to fill in any gaps or holes with suitable filler or putty before smoothing out the surface for a seamless finish.
By taking the time to properly assess and repair the wall, you can ensure a solid foundation for the new plaster. Remember that proper preparation is key to achieving a professional-looking result that will stand the test of time.
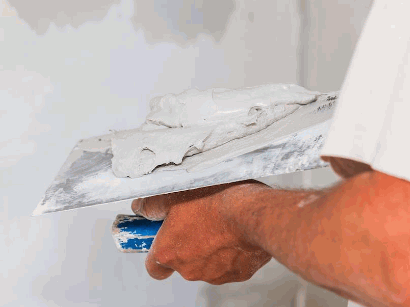
Mixing the plaster correctly is essential for a successful plastering job. Combine the plaster material with water in a bucket, following the recommended ratio to achieve a smooth and workable consistency.
It's crucial to measure both the plaster and water accurately to ensure the right balance. Start by adding the plaster material into the water gradually, stirring continuously. The consistency should be akin to thick pancake batter, neither too runny nor too thick.
Avoid mixing large batches at once, especially if you're new to plastering. Consistency is key; a well-mixed plaster compound will adhere better to surfaces and reduce the chances of cracking.

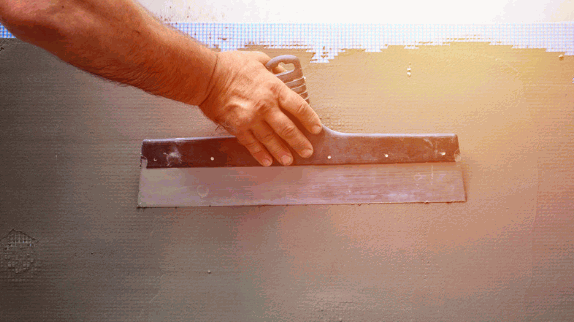
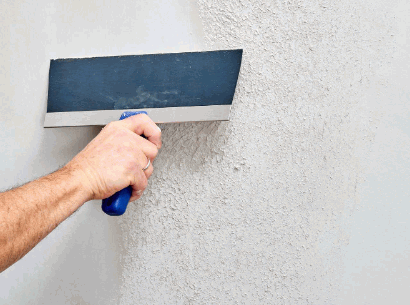
Applying the first coat of plaster is a critical step in the plastering process. Begin by using a trowel to spread the plaster evenly over the wall surface, ensuring that no cracks or imperfections. Allow the first coat to dry slightly before proceeding to the next steps.

Once the first coat has dried slightly, it's time to apply the second coat of plaster. Using the same techniques as before, spread the plaster smoothly over the wall surface, ensuring a consistent thickness for a flawless finish.

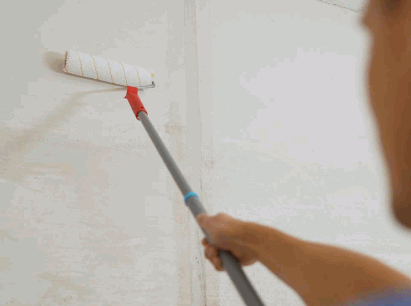
After the plaster has dried completely, it's time to add the finishing touches. Sand the plastered wall to achieve a smooth and even surface, readying it for painting to enhance the overall look of the project.
With the surface now primed and smooth, it's time to choose the perfect paint colour and finish to bring your vision to life. A fresh coat of paint not only adds aesthetic appeal but also acts as a protective layer, ensuring the longevity of your work.
Once the plastering job is complete, it's essential to clean up the work area thoroughly. Remove any leftover plaster material, clean the tools, and ensure the surroundings are tidy and free of debris.
To start the clean-up process, gather all the tools and equipment used during the plastering project. Place them on a clean surface and inspect each tool for any hardened plaster or residue that needs to be removed.
Proper maintenance of your tools is crucial for their longevity and efficiency in future projects. Wipe them down with a damp cloth or use cleaning solutions suitable for the type of tool to ensure they are in good condition.
Sweep the floor and surrounding areas to get rid of any plaster dust or debris that may have accumulated during the project.
In plastering projects, there are common mistakes that can hinder the final result. Avoid issues like applying too thick a coat, not allowing proper drying time, or neglecting to address cracks or imperfections for a professional outcome.
One critical mistake to avoid is failing to prepare the surface adequately before beginning the plastering process. Surface preparation is key to ensuring the plaster adheres correctly and results in a smooth finish. Without proper preparation, the plaster is more likely to crack or peel over time, leading to a compromised overall aesthetic. Another error to watch out for is mixing the plaster incorrectly, which can impact its consistency and workability. Proper mixing ratios and techniques should always be followed to achieve the desired results.
To achieve a professional finish in your plastering projects, consider tips such as ensuring the plaster is of the right consistency, using the correct technique for application, and selecting the appropriate type of plaster for the job at hand.
Paying attention to the surface preparation before applying the plaster can significantly impact the final result. Properly clean and prime the surface to ensure better adhesion and a smoother finish. Additionally, controlling the drying time is crucial for achieving a seamless look. Avoid rapid drying by maintaining optimal room temperature and humidity levels. Utilising high-quality tools and equipment, such as trowels and floats, can also help in achieving a more professional outcome. Practice is key; the more you work on your plastering skills, the better your results will be.
For a successful plaster application, ensure the plaster is of the right consistency before using a trowel to spread it evenly over the wall surface. Pay attention to details and apply the plaster with precision for a flawless finish.
Explore in-depth: What Is A Plaster Ceiling
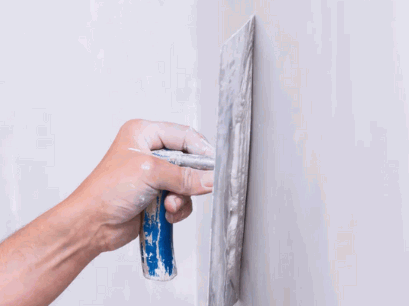
To achieve a smooth plaster finish, pay attention to the application technique. Use a trowel to spread the plaster evenly, ensuring a consistent thickness across the surface. Practice proper smoothing techniques for a flawless outcome.
After the plaster has dried, use sandpaper to smooth the surface. Start with a coarse grit sandpaper to remove imperfections and finish with a finer grit for a polished look.
Once the plaster has dried and been sanded, it's time to paint the wall. Select a suitable paint colour and apply it evenly over the plastered surface for a vibrant and polished final look.
In conclusion, mastering the art of plastering requires attention to detail, precision in application, and dedication to achieving a smooth and flawless finish. By following the right techniques and using quality materials, you can transform any wall into a work of art.
Plastering is not just about covering walls; it's about a blend of skill and passion that results in a seamless finish. The process involves preparing the surface, applying coats of plaster, and meticulously smoothing it out for a polished look.
The technique is crucial – from the initial layer to the final polish, each step contributes to the overall quality. A keen eye for imperfections and a steady hand are essential to ensure no bumps or rough patches disrupt the surface. Professionals in the field emphasise dedication because perfection is not achieved overnight; it takes practice and commitment to hone your craft. With patience and persistence, anyone can elevate their plastering skills and create stunning, flawless finishes that stand the test of time.
In the world of plastering, attention to detail and craftsmanship are key to success. Whether one is a DIY enthusiast or a professional contractor, taking the time to perfect plastering techniques can elevate the quality of the work and result in stunning, durable finishes.
Mastering the art of plastering involves more than just basic skills; it requires honing one's ability to smoothly apply plaster, create even surfaces, and seamlessly blend textures.
This dedication to continuous improvement not only enhances the aesthetic appeal of projects but also ensures the structural integrity of the surfaces being plastered.